First Practice Project
It’s Time! Time to work with some metal, time to squeeze a first rivet. This has been a long time coming and while you are reading this I’m already a bit further. Just can’t help myself… I’m having fun 🙂
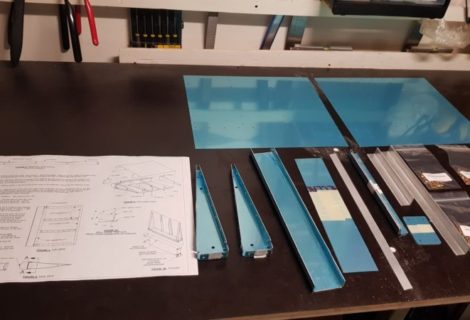
Cleaveland Tool as part of their Toolkit had shipped a little easter egg surprise in the box. A small practice project to make a mobile phone stand. I had seen it on their site but initially decided against ordering it as I didn’t really need one but in the end I’m glad Cleaveland were smarter than me. There’s no such thing as to much practice.

The project consists of a few small sheets of aluminum, a bent piece, some angle and a bunch of rivets. This is the first time you can actually compare lengths, see the difference in those heads (flush heads and dome heads)
First step was to clean up the sheets with the deburring tool and try out the Scotchbrite wheel. That wheel does take the difficulty out of parts cleanup but it also quickly becomes clear it is easy to clean up to much and end up with a part which is to small. Second lesson : Read the plans! Read them. And when you’ve read them… read them again. There’s a lot of words in a sentence and one word missed might give a different meaning to the instruction.

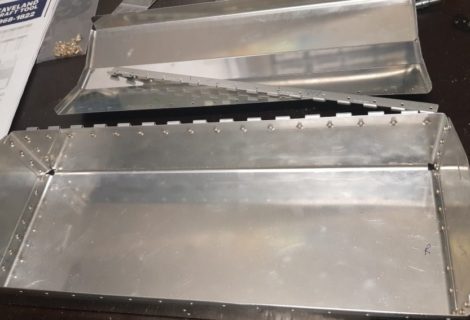
It’s also not bad to keep an eye on the big picture. What are you trying to achieve? The mobile phone stand is basically two pieces of sheet riveted to a back plate. So on the pieces which meet… do you need a large angle curve? Nope. The large curve looks nice on the outside but on the place where two pieces meet, probably a smaller radius would be better. Lesson learned. Think ahead.

Obviously putting pieces together means a whole process of deburring, drilling, deburring again, dimpling, riveting etc… so good practice to getting used to work with those new tools. Setting up that pneumatic squeezer for both dimpling and squeezing rivets, slightly adjusting them as I proceed.
In the end I’m quite happy with the result and with what I’ve learned. Have I made mistakes? YES! Do I have bad rivets? YES. I have some good ones, some acceptable ones and one bad one. I moved the squeezer while pressing the actuator which meant the rivet popped out a bit while being squeezed. No Big deal. That’s gonna be a practice case for drilling out rivets. I’m sure I’ll have to do plenty of that.

Overall it was a fun way to start with a little project. It was done in a few hours and an experienced builder probably would do it in less than an hour but I did it… it were my first rivets. On to the next one!


